Hi! First off: I added an FAQ to my website. This is long overdue; it took me a while to realize that this whole thing I’m doing is a little inaccessible if you haven’t been following along! Hopefully this page clears things up; if you have suggestions for additions, let me know, okay?
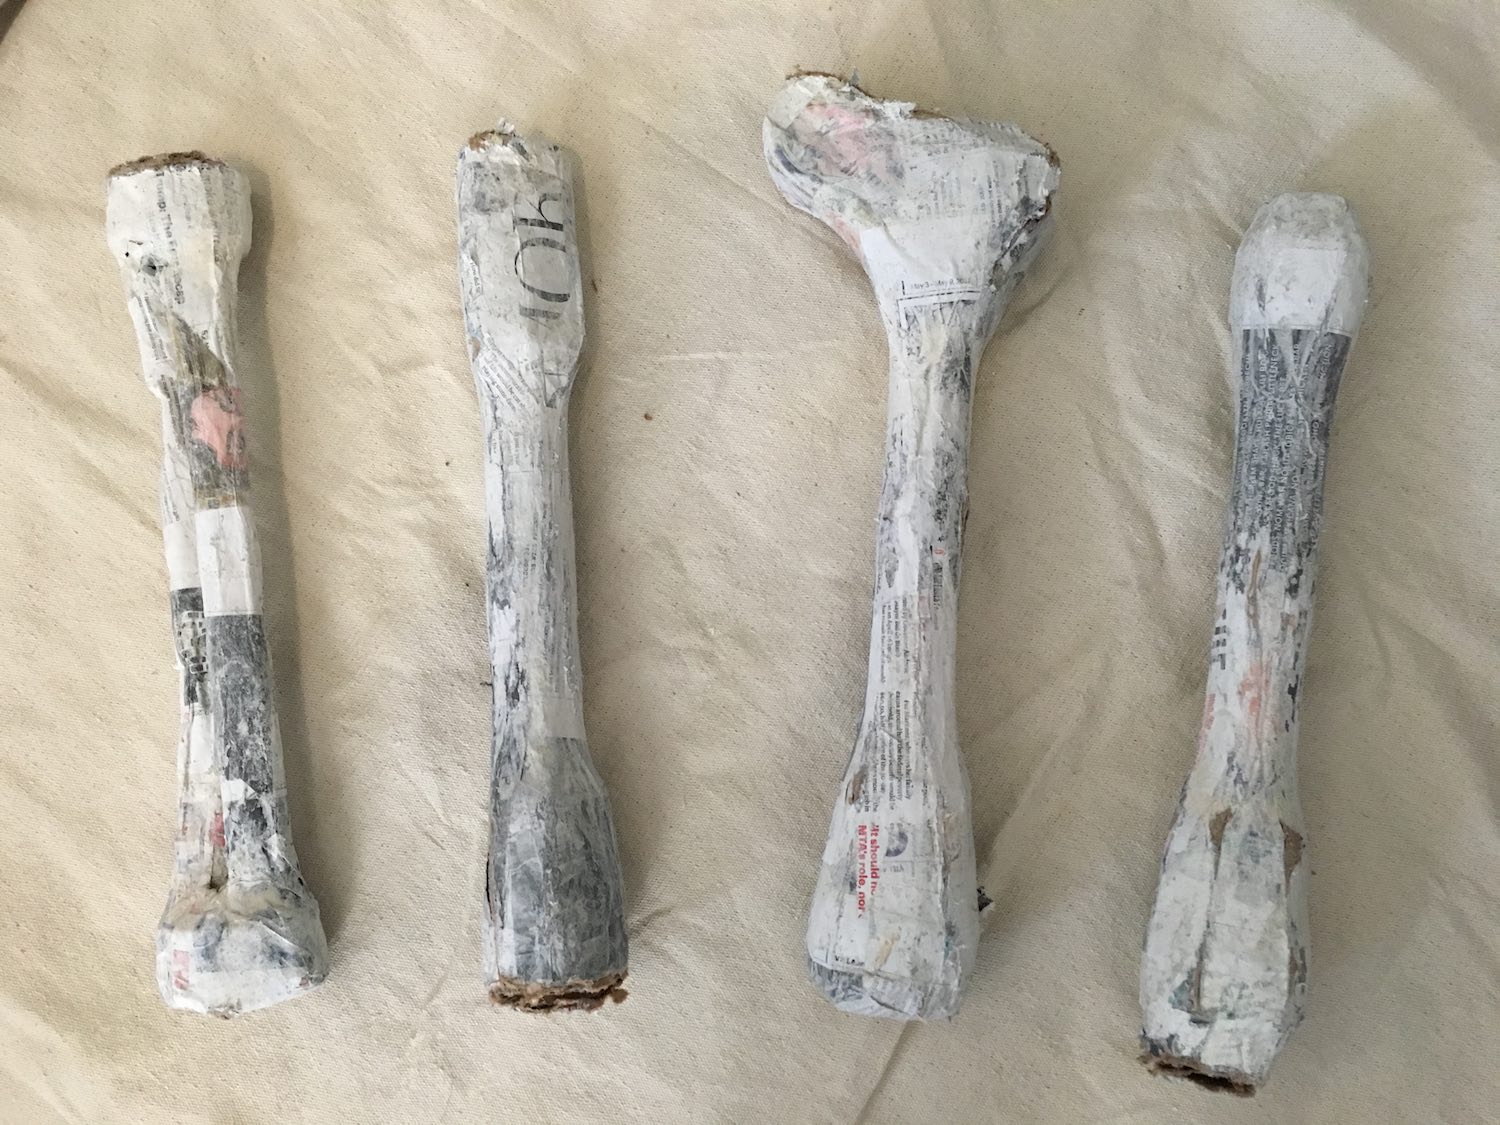
In Halloween news, here’s how some bones are looking:
These are forms for the limbs on one side of a skeleton: forearm, upper arm, thigh, and shin, respectively. You’re seeing them in progress, after filing off some hard edges and before another layer of papier-mâché. The idea is to get these looking really nice and smooth, and then cover them in cling film and more papier-mâché, so I can make as many copies of each as I need. (They’re symmetrical, so they’ll work for each character’s left and right sides.)
Last year’s skeletons were built from lengths of PVC pipe that were built up on the ends to look bone-like. Those pieces were really heavy, very time-intensive, and not nearly as expressive as I would have liked. By spending a lot of time on one of each unique piece, I should save a lot of time overall and have better-looking figures.
Each cast will be filled with an armature made of very rigid cardboard pipes—kinda like mailing tubes, but triangular, so they’re even stronger. The joints will be attached to the tubes directly, so the relatively more fragile outer parts don’t have any structural responsibilities. Most joints will be made of zip ties; some characters that have more precise needs will have hinges made of plywood, I think.
I started building the armature for a second skeleton, to go with our juggler; by next week, both of their limbs should be looking just right! I’m still thinking about the best way to build torsos—last year’s PVC/wire/spray foam thing was not the answer. Too heavy, too unwieldy. I think I can make some forms for ribs and hips just like the limbs. We’ll see next week!
Here’s an update to the floor plan:
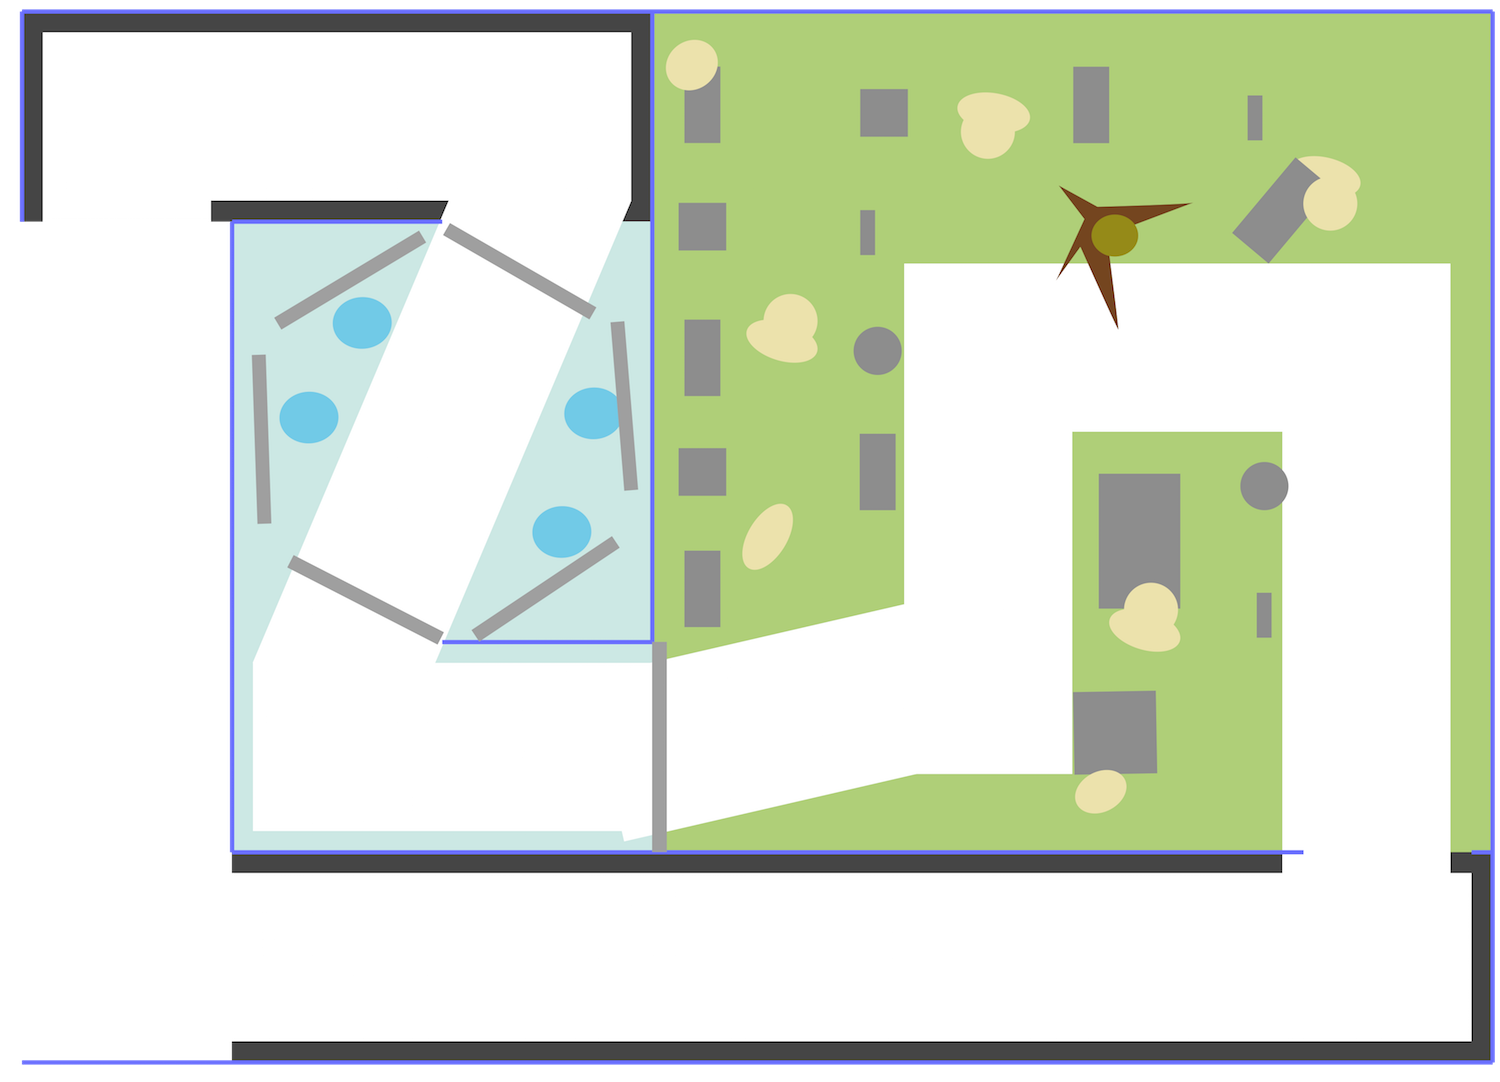
This is about the same size as the last one, but sized for a new venue—a theater in lower Manhattan. I saw a show there over the weekend and I’m taking a tour tomorrow. I think this is the place.
This floor plan is not wall-to-wall but instead relies on a 5' grid of supports that I’m planning to build out of PVC pipes that will be reusable for future attractions. The back corner of the graveyard will use more conventional backdrop supports. Speaking of which, I adjusted the path a bit so that guests never get close to that back wall, which gives us a chance to play with forced perspective. The brick texture on that wall, and set pieces that are close to that wall, will be built smaller than stuff near the path, to make it all look farther away. For example: the juggler skeleton will be in a far corner and is scaled to 80% of the rest of those folks. I’m very excited for this!
Other stuff I’ve been thinking about this week that I haven’t brought up yet; consider these teasers for future installments of this series:
I changed the gate latch mechanism so that it’s purely mechanical now, with a human-powered gate return on a rope behind the bottom-left wall of the show space. This should be a lot easier to build and much more reliable. The effect in the alley will probably be triggered by an IR sensor now, where previously it was going to be synced to the opening of the gate.
Just before giving up on the gust-of-wind gag in the alley, I did some research on vortex cannons. They’re much simpler to build than I would have guessed, and I am now once again convinced that I can add an automated puff of air to this show without pneumatics!
Also simpler than I thought? Fog chillers. I hope this venue is cool with fog. I’ll ask.
I nixed the motorized curtain on the exit corridor in favor of a good old fashioned corner. I’m going to adjust the placement of the portraits in that corridor to keep people away from the corner for longer, until just before the final gag is finished.
That’s all for now. Stay spooky!